

I'm throwing my hat into the ring to try out to be selected to the premier team of May Arts Ribbonistas. The wide selection of May Arts Ribbons and Trims are unparalleled - and also as rich and luscious as they look... which is wonderful because... Ribbon is a Staple of my Mixed-Media Toolkit - I couldn't create without it!
I love to recycle and I always try to creatively repurpose everyday items - and - this has me constantly making things and always finding something new to ARTfully Upcycle. This project is an altered Laughing Cow Cheese Box all decked out to present a gift card for a birthday party!

Ribbons are the perfect detail to transform
something blah to WOW!


With some patterned paper scraps, some bits of ribbon and a little bling, this box has been transformed to a fun and festive gift card holder... complete with a repurposed candle, too! It doesn't take a whole lot of supplies or time to create a handmade gift box - and can be changed up to fit your occasion, whether a baby shower, a wedding or a thank-you!
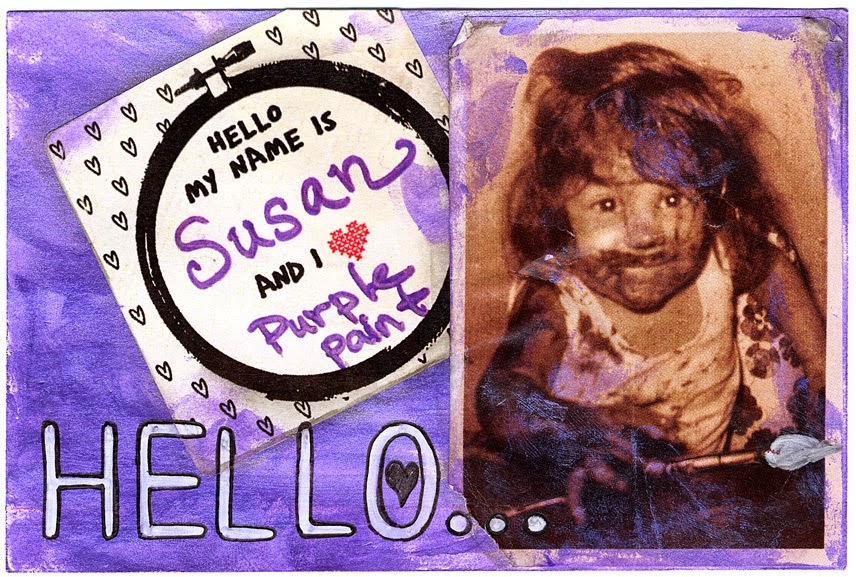
Greencrafted Wall Decor...
I've transformed this empty card box into a shadow box with some gesso, leftover painted paper and textured paper scraps, silver cellophane tissue, an empty perfume mini, a broken skeleton key, loads of miracle tape, some May Arts MH10 - Black/White Stitch grosgrain ribbon for edging adhered with Helmar 450 adhesive, and stamps from Viva Las VegaStamps!...


The ribbon trim really adds texture and interest
while covering plain edges!
Upcycled Halloween party attire...

This Ghoulish Gal is ready for the halloween party wearing this fanciful witches hat complete with matching handbag.

I'm using these gorgeous May Arts Ribbons and trims paired with some off-cut strips of purple organza to create my spooky-cute accoutrements: May Arts XA38 - Orange/Black 1.5" 1.5 Inch Solid / Pom Pom Edge (Wired) Ribbon; WA10 - Black/White EDGE 1 Inch Stitched Grosgrain Ribbon; BX28 - ORANGE 2 Inch Sheer Spider Web Ribbon; SX28 - Orange 3/8 Inch Grosgrain Ribbon; and SK10 - Black 1.25 Inch Silk Ribbon.

I first began with the purse which started out as an empty recycled vinyl tote - you know the ones that contain gifts of lotions and potions and other tasty goodness around the holidays... I save these for repurposing for crafty projects.

I am all about the details and these beautiful May Arts Ribbon are full of it. I layered three of the ribbons using an iron-on fusible webbing to create the strap which wraps all the way around the vinyl purse structure and also around the hat fitted with a gold ribbon buckle.
Today I'm sharing a little how-to on how to layer ribbons. You will need some fusible webbing {a.k.a Stitch Witchery}, scissors, your ribbons to be layered, some scissors and mini paddle iron. You could use a regular iron, but be careful about applying too much heat so ribbons don't get scorched. I used the mini paddle iron for ease and precise heat application.

First, I gently press the ribbons flat, let cool then layer the black stitched grosgrain on top of the orange.

Cut fusible web to size then align layers.

Press with iron to heat set fusible webbing. This stuff is like magic and is widely used for setting hems on clothing - but it works great for layering ribbon, too!

Now that I've got the first layer done, I'm repeating the process. I trim the fusible webbing in half to match the width of the thinner ribbon and align the layers.

Repeat by ironing to fuse this layer in place.

I used pinking shears to trim the edges to prevent fraying.

I put the layered side of the ribbon down which can be seen on the inside and also is a nice detail and contrast on the inside of the handle. I adhered the ribbon directly to the vinyl tote using Helmar 450 adhesive and I'm happy that this adhesive stayed clear and did not seep into and discolor the ribbon like most adhesives do.

The side of the handle is tied off with the black silk ribbon and accented with some blinged up party favors.

My favorite part is the skeleton hand that looks like its crawling through the spider web ruffles on the front. Some purple organza tucked inside to conceal the contents and this purse is complete.

The hat is made from a recycled piece of black canson paper that had something I started drawing on it... so long ago that I can't even recall what it was. So a witch hat base it became! I adhered the purple organza to the top and to the brim them began adding the spider web ruffles and the layered ribbon around as a belt with a buckle from my notions box. I twisted and coiled the black silk ribbon around the cone with gives a playful twist. With my strappy purple satin heels, little black dress and purple spiderwebbed cape... this duo completes my Halloween party attire.
I hope this project inspires you to create something with ribbons and fiber! The possibilities and uses are endless...and only limited by your imagination.
Wish me luck in my application to be a May Arts Ribbonista. I'm crossing my fingers. Have a creative day!!! : ) Sb


No comments:
Post a Comment
I would love to hear your thoughts and comments...